PowerMind Dynamics User Guide
PowerMind AI Studio is a centralized enterprise AI control plane that provides multi-tenant orchestration, execution, governance, and LLMOps capabilities. Integrated with PowerMind Dynamics, PM Studio offers seamless conversational AI, file analysis, real-time performance tracking, and granular model lifecycle and access management.
This guide details step-by-step instructions for navigating and utilizing PowerMind AI Studio using standard platform interface workflows.
📑 Table of Contents
- Platform Access & Authentication
- Navigating to PowerMind Dynamics
- Chat Interface & Conversational Workspace
- Model Selector & Conversation Management
- Model Catalog Management
- Configuring Model Access & Visibility (Public vs. Private)
1. Platform Access & Authentication
To access the PowerMind AI Studio web interface:
- Open your web browser and navigate to your enterprise PM Studio URL (provided by your platform administrator).
- On the sign-in page, enter your corporate credentials:
- Username / Email:
<your_username>(or assigned enterprise ID) - Password:
<your_password>
- Username / Email:
- Click Sign In to access the control plane dashboard.
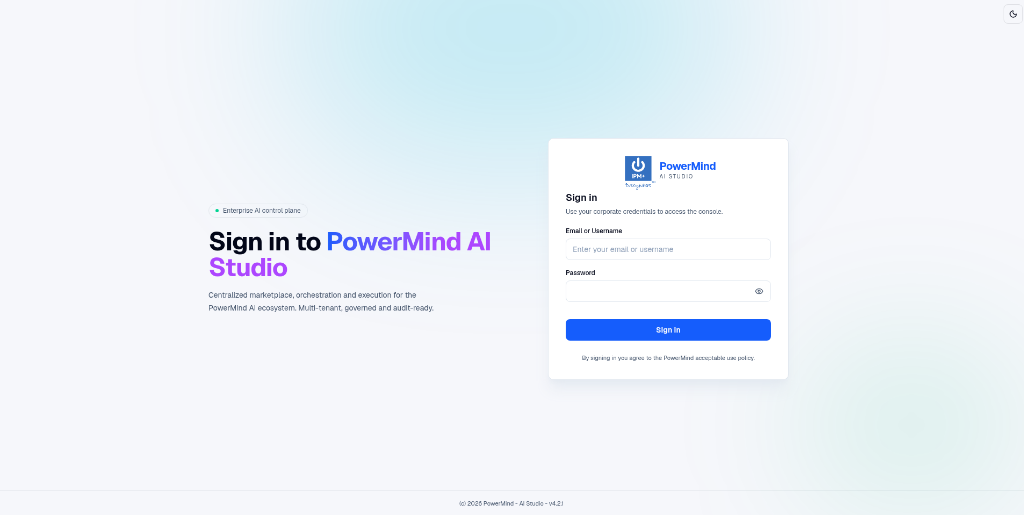
Figure 1: PowerMind AI Studio Enterprise Sign-In Screen.
2. Navigating to PowerMind Dynamics
Once logged in:
- In the left navigation sidebar under the Tools menu, locate the LLMOps section.
- Select Dynamics (
AI Studio > Tools > dynamics). - You will be presented with two main tabs at the top of the Dynamics workspace:
- 💬 Chat: For conversational AI, document Q&A, and prompt execution.
- 📦 Models: For model lifecycle control (loading, unloading, downloading, and permissions).
3. Chat Interface & Conversational Workspace
The Chat tab provides a real-time environment for prompt engineering and model interaction.
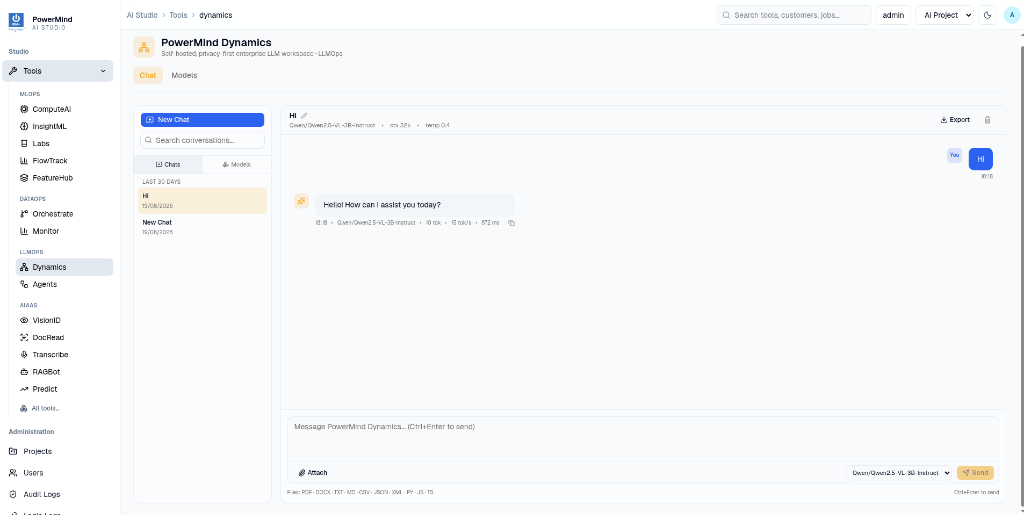
Figure 2: PowerMind Dynamics Conversational Interface with Inference Metrics.
Key Features:
- New Chat: Click
+ New Chatin the left sidebar to start a fresh conversation session. - Real-Time Performance Metrics: Each model response displays real-time telemetry:
- Timestamp
- Model ID
- Total Tokens generated
- Generation Speed (tokens/s)
- Latency (ms)
- Document & File Uploads: Click the 📎 Attach button to upload contextual files. Supported extensions include:
PDF,DOCX,TXT,MD,CSV,JSON,XML,PY,JS,TS. - Export & Settings: Use the Export button at the top right of the message container to download conversation transcripts.
4. Model Selector & Conversation Management
You can easily select active models and organize past chat history using the left pane.
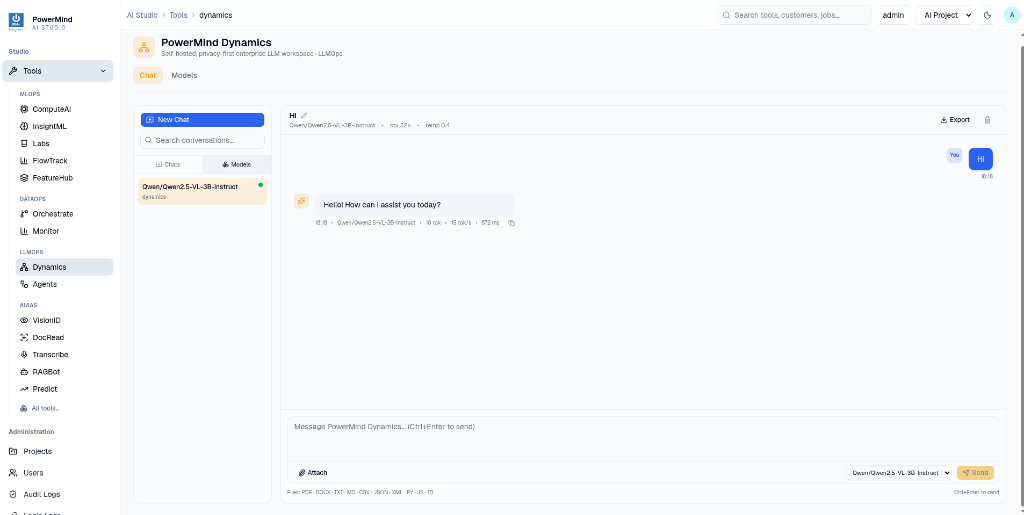
Figure 3: Sidebar Chat History and Active Model Selection.
Steps to Switch Models in Chat:
- Click the model dropdown menu at the bottom right of the input box or switch to the Models tab in the sidebar toggle.
- Select the desired running model.
- Type your message and press
Enteror click Send.
5. Model Catalog Management
Click on AI Studio > Tools > dynamics > models (or the Models tab) to access the Model Catalog.
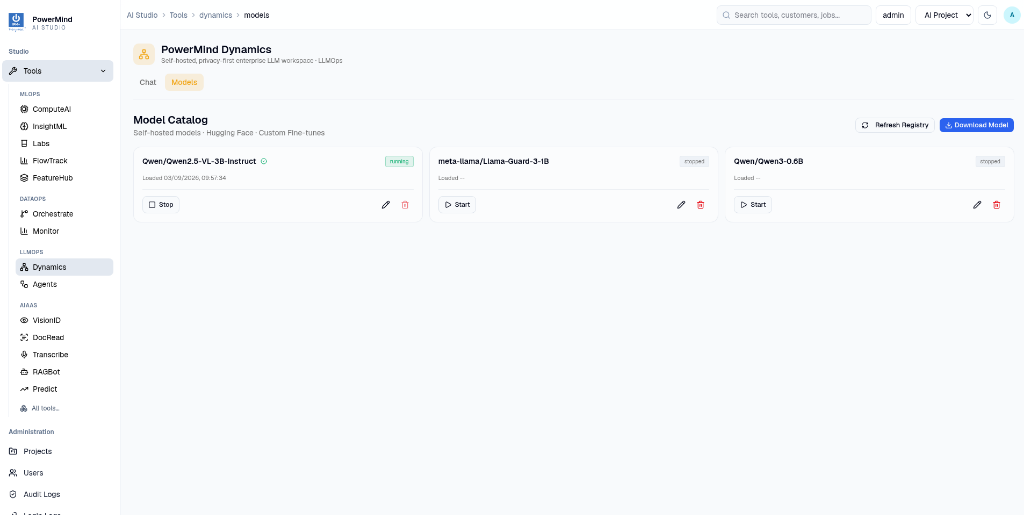
Figure 4: Model Catalog Overview with Status Badges and Controls.
Available Actions:
- Model Status Indicators:
- 🟢
running: Model is currently loaded into GPU memory and ready for inference. - 🔴
stopped: Model is saved on disk but unloaded from GPU memory.
- 🟢
- Start / Stop Models:
- Click ▶ Start to load an unloaded model into GPU memory.
- Click ⏹ Stop to unload a running model and free up GPU resources.
- Download Model: Click the blue ⬇ Download Model button at the top right to pull public or gated models directly from HuggingFace.
- Refresh Registry: Click 🔄 Refresh Registry to update model availability.
- Edit & Delete:
- Click the ✏️ Edit (Pencil) icon to open access control settings.
- Click the 🗑️ Delete (Trash) icon to delete a model from storage.
6. Configuring Model Access & Visibility (Public vs. Private)
PowerMind Dynamics supports granular Role-Based Access Control (RBAC) for all deployed models.
- In the Model Catalog, locate the target model.
- Click the ✏️ Edit icon on the model card.
- The Edit Model Access modal will appear:
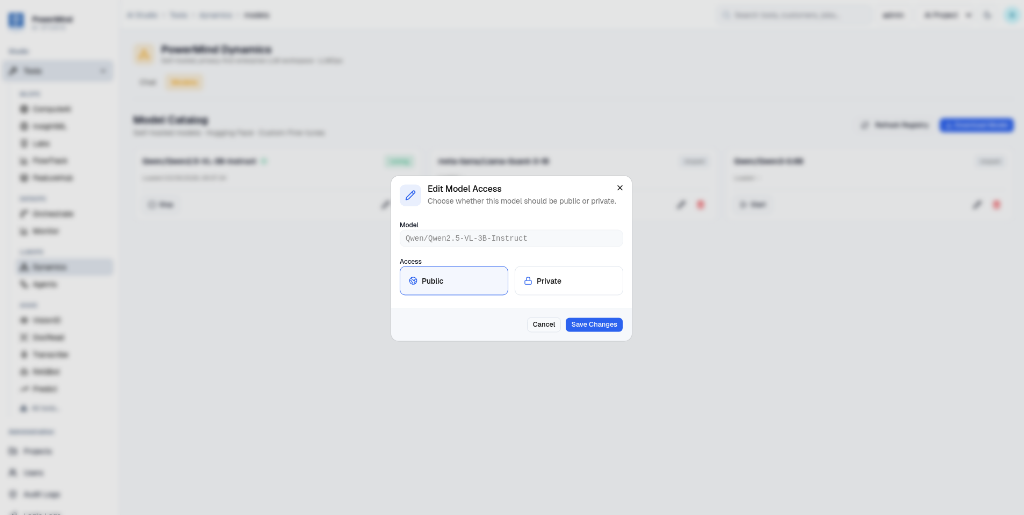
Figure 5: Model Access Control Modal (Public vs. Private).
- Choose visibility mode:
- 🌐 Public: Makes the model visible and accessible to all authorized enterprise users.
- 🔒 Private: Restricts access strictly to the owner and administrators.
- Click Save Changes to apply the access policy.
Documentation compiled for PowerMind AI Studio